Updated 2018-05-08: Added email delivery section and corrected requirements for Git Smart HTTP
What we will do
- Install Redmine 3.4.x
- Use RVM to be able to easily update Ruby when needed
- Use Apache and Passenger to serve pages
- [Optionally] Configure Email delivery
- [Optionally] secure the installation with Let’s Encrypt SSL certificate
- [Optionally] configure git
- [Optionally] install a cool theme
Before starting
This was tested on Debian 9.4 (Stretch) with Redmine 3.4.x but it should be compatible with future updates.
I used Digital Ocean’s droplet. It’s not the cheapest available around ($5/month) but I’m very happy with the performances and quality of service. Shameless advertisement: If you use this link to register, I will get a discount on my next bill. Thanks! :p
You will need a minimum of 1GB of RAM to compile everything needed though more than 1.5GB of RAM is recommended. If you have less than 1GB memory or face a compilation error due to memory outage, you can still have it work creating a swap file.
Note that the total installation time will mostly depend on the server’s internet connection speed and compilation speed.
Install the things
#Get all the packages we will need
apt-get update
apt-get -y install subversion mariadb-server libmariadbclient-dev apache2 apache2-dev \
libapr1-dev libaprutil1-dev libcurl4-gnutls-dev libmagickwand-dev imagemagick build-essential \
dirmngr curl
Installing RVM and Ruby 2.4
If you’re uneasy about running a script from the internet, check the official detailed instructions for more security: https://rvm.io/rvm/security
curl -sSL https://rvm.io/mpapis.asc | gpg --import -
curl -sSL https://get.rvm.io | bash -s stable --ruby=2.4
source /usr/local/rvm/scripts/rvm
Get Redmine
cd /opt/
mkdir redmine
cd redmine/
svn co http://svn.redmine.org/redmine/branches/3.4-stable current #URL can be replaced with latest version
cd current/
mkdir -p tmp tmp/pdf public/plugin_assets
chown -R www-data:www-data files log tmp public/plugin_assets
chmod -R 755 files log tmp public/plugin_assets
mkdir -p /opt/redmine/repos/svn /opt/redmine/repos/git
chown -R www-data:www-data /opt/redmine/repos
cp config/configuration.yml.example config/configuration.yml
cp config/database.yml.example config/database.yml
Fix for utf8mb4
At the moment of writing, there is an issue with migration using utf8mb4 that requires a patch. utf8mb4 mainly prevents a crash when emojis are used. Without the patch, you will have to create the database using utf8 instead of utf8mb4 to prevent the error:
== 28 CreateWikiPages: migrating ==============================================
-- create_table(:wiki_pages)
-> 0.0098s
-- add_index(:wiki_pages, [:wiki_id, :title], {:name=>:wiki_pages_wiki_id_title})
rake aborted!
StandardError: An error has occurred, all later migrations canceled:

Mysql2::Error: Specified key was too long; max key length is 767 bytes: CREATE INDEX `wiki_pages_wiki_id_title` ON `wiki_pages` (`wiki_id`, `title`)
Create a the following file:
nano /opt/redmine/current/config/initializers/ar_innodb_row_format.rb
Edit it as:
ActiveSupport.on_load :active_record do
    module ActiveRecord::ConnectionAdapters
        class AbstractMysqlAdapter
            def create_table_with_innodb_row_format(table_name, options = {})
                table_options = options.reverse_merge(:options => 'ENGINE=InnoDB ROW_FORMAT=DYNAMIC')
                create_table_without_innodb_row_format(table_name, table_options) do |td|
                    yield td if block_given?
                end
            end
            alias_method_chain :create_table, :innodb_row_format
        end
    end
end
Modify MariaDB configuration:
echo "[mysqld]" > /etc/mysql/mariadb.conf.d/60-innodb-utf8-mb4.cnf
echo "innodb_large_prefix             = 1" >> /etc/mysql/mariadb.conf.d/60-innodb-utf8-mb4.cnf
echo "innodb_file_format              = barracuda" >> /etc/mysql/mariadb.conf.d/60-innodb-utf8-mb4.cnf
echo "innodb_file_per_table           = 1" >> /etc/mysql/mariadb.conf.d/60-innodb-utf8-mb4.cnf
And restart it:
systemctl restart mysqld.service
Thanks Stanislav Tilsh for the solution!
Create the database
Login as root to the database:
mysql -uroot
CREATE DATABASE redmine CHARACTER SET utf8mb4;
CREATE USER 'redmine'@'localhost' IDENTIFIED BY 'my_password';
GRANT ALL PRIVILEGES ON redmine.* TO 'redmine'@'localhost';
EXIT;
Configure database connection
nano config/database.yml #Edit database configurationEdit such as:
production:
  adapter: mysql2
  database: redmine
  host: localhost
  username: redmine
  password: "my_password"
Don’t forget to replace “my_password” by your actual password created earlier.
Installing bundler and passenger
If you have 1GB or less, you will be advised to create a swap file to enable for the compilation to complete sucessfully.
gem install bundler passenger #Install the gems
passenger-install-apache2-module --auto --languages ruby
 #Compile the passenger module for Apache, requires the gem to be installed
passenger-install-apache2-module --snippet > /etc/apache2/conf-available/passenger.conf
a2enconf passenger # Enable the passenger snippet
Now let the bundler install Redmine dependencies
cd /opt/redmine/current
bundle install --without development test
bundle exec rake generate_secret_token
RAILS_ENV=production bundle exec rake db:migrate
RAILS_ENV=production bundle exec rake redmine:load_default_data # Change fixtures language
nano /etc/apache2/sites-available/redmine.conf
ServerName redmine.domain.com

<VirtualHost *:80>
    ServerAdmin [email protected]
    ServerName redmine.domain.com

    DocumentRoot /opt/redmine/current/public/

    ## Passenger Configuration
    ## Details at http://www.modrails.com/documentation/Users%20guide%20Apache.html

    PassengerMinInstances 2
    PassengerMaxPoolSize 6
    RailsBaseURI /
    PassengerAppRoot /opt/redmine/current

    # Speeds up spawn time tremendously -- if your app is compatible.
    # RMagick seems to be incompatible with smart spawning
    RailsSpawnMethod smart

    # Keep the application instances alive longer. Default is 300 (seconds)
    PassengerPoolIdleTime 1000

    # Keep the spawners alive, which speeds up spawning a new Application
    # listener after a period of inactivity at the expense of memory.
    RailsAppSpawnerIdleTime 3600

    # Additionally keep a copy of the Rails framework in memory. If you're
    # using multiple apps on the same version of Rails, this will speed up
    # the creation of new RailsAppSpawners. This isn't necessary if you're
    # only running one or 2 applications, or if your applications use
    # different versions of Rails.
    PassengerMaxPreloaderIdleTime 0

    # Just in case you're leaking memory, restart a listener
    # after processing 500 requests
    PassengerMaxRequests 500

    # only check for restart.txt et al up to once every 5 seconds,
    # instead of once per processed request
    PassengerStatThrottleRate 5

    # If user switching support is enabled, then Phusion Passenger will by default run the web application as the owner if the file config/environment.rb (for Rails apps) or config.ru (for Rack apps). This option allows you to override that behavior and explicitly set a user to run the web application as, regardless of the ownership of environment.rb/config.ru.
    PassengerUser www-data
    PassengerGroup www-data

    # By default, Phusion Passenger does not start any application instances until said web application is first accessed. The result is that the first visitor of said web application might experience a small delay as Phusion Passenger is starting the web application on demand. If that is undesirable, then this directive can be used to pre-started application instances during Apache startup.
    PassengerPreStart http://localhost


    <Directory /opt/redmine/current/public/>
       Options FollowSymLinks
       Require all granted
    </Directory>


    AddOutputFilter DEFLATE text/html text/plain text/xml application/xml application/xhtml+xml text/javascript text/css
    BrowserMatch ^Mozilla/4 gzip-only-text/html
    BrowserMatch ^Mozilla/4.0[678] no-gzip
    BrowserMatch \bMSIE !no-gzip !gzip-only-text/html


    ErrorLog ${APACHE_LOG_DIR}/redmine.error.log
    LogLevel warn
    CustomLog ${APACHE_LOG_DIR}/redmine.access.log combined
    ServerSignature Off

</VirtualHost>
Check permissions and fire up Apache
chown -R www-data:www-data /opt/redmine/current/log /opt/redmine/current/Gemfile.lock #Check permissions

a2enmod rewrite
a2enmod headers
a2dissite 000-default
a2ensite redmine
systemctl restart apache2.service
Done! 19 minutes and 56 seconds on the chronometer
Out of curiosity, please add a comment with you completion time and the host on which you did it.
You should now login to your new instance:
Login: admin
Password: admin
[Optional] Configure Email delivery
I favor using exim4 as a buffer for outgoing email but you can also configure to deliver directly over an external SMTP.
Option1: Exim relay
Configure exim either as a site (don’t forget to set SPF records accordingly), or as a SMTP relay:
dpkg-reconfigure exim4-configEdit configuration file:
nano /opt/redmine/current/config/configuration.ymlOption2: Direct delivery
Configure with instruction from official wiki: http://www.redmine.org/projects/redmine/wiki/EmailConfiguration
[Optional] Add SSL/TLS support
Official instructions: https://certbot.eff.org/lets-encrypt/debianstretch-apache
Note that you will need to have configured a domain name for your Redmine instance. (Certbot doesn’t allow certs for IPs)
a2enmod ssl
apt-get update
apt-get -y install python-certbot-apache
#Follow instructions
certbot --authenticator webroot -w /opt/redmine/current/public/ --installer apache
It’s always a good idea to check with SSL Labs’s tool the quality of the SSL implementation: https://www.ssllabs.com/ssltest/
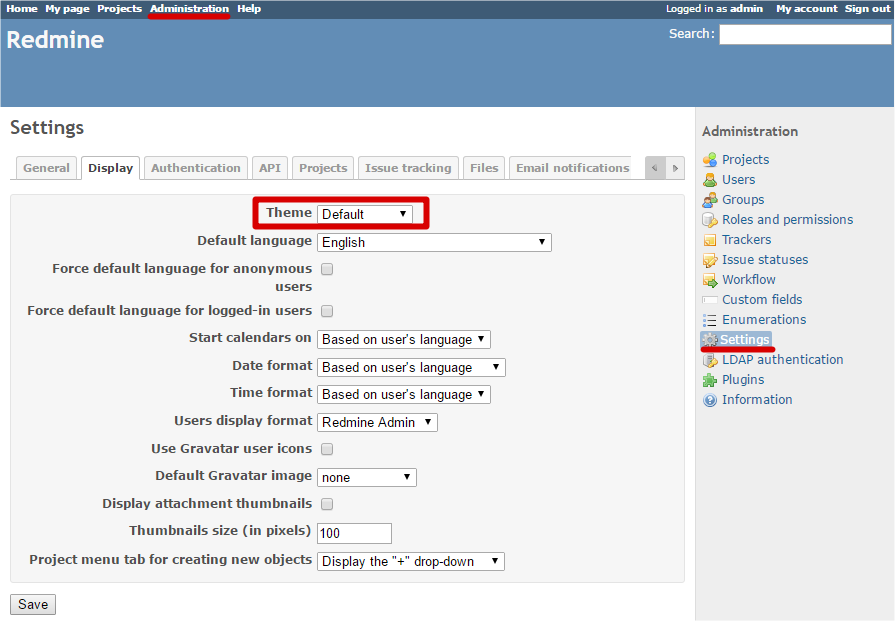
[Optional] Add a cool theme
Redmine’s default theme feels quite outdated and could be the reason of push back from your users. After testing several, I’m sticking to the PurpleMine2 theme by Grzegorz Rajchman:
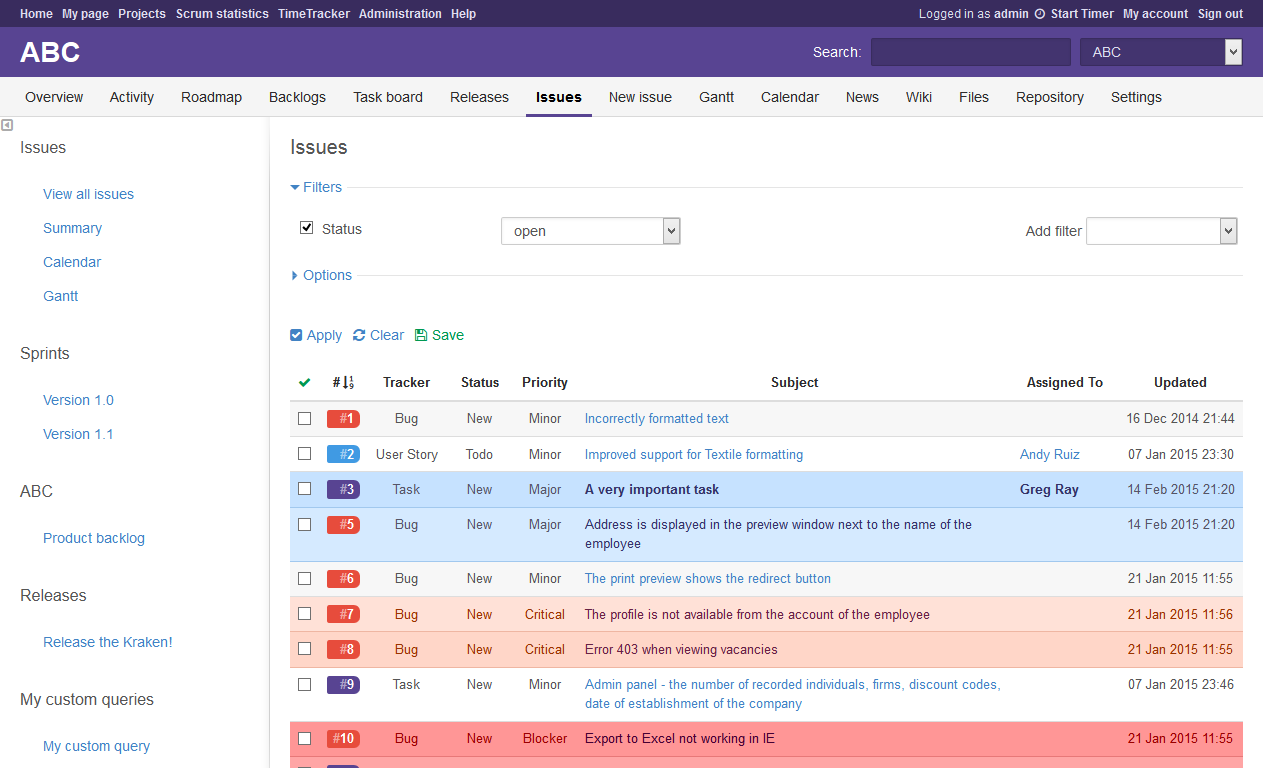
To install it:
apt-get install git
cd /opt/redmine/current/public/themes
git clone https://github.com/mrliptontea/PurpleMine2.git
Then login as Administrator in Redmine, go to Administration / Settings then in the Display tab you can edit the Theme
[Optional] Add git support
nano /etc/apache2/sites-available/redmine.conf
Note that if you configured ssl with Certbot, the file to edit will be nano /etc/apache2/sites-available/redmine-le-ssl.conf
And add this in the VirtualHost:
    # /git location for users
    # Git Smart HTTP configuration
    #From the Remine.pm patch file for git-smart-http:
    SetEnv GIT_PROJECT_ROOT /opt/redmine/repos/git/
    SetEnv GIT_HTTP_EXPORT_ALL

    ScriptAlias /git/ /usr/lib/git-core/git-http-backend/

    PerlLoadModule Apache::Redmine

    <Location /git>
        <RequireAll>
                AuthName "git repositories"
                Require valid-user
                AuthUserFile /dev/null
        </RequireAll>


        PerlAccessHandler Apache::Authn::Redmine::access_handler
        PerlAuthenHandler Apache::Authn::Redmine::authen_handler

        ## for mysql
        RedmineDSN "DBI:mysql:database=redmine;host=localhost"
        RedmineDbUser "redmine"
        RedmineDbPass "my_password"
        RedmineGitSmartHttp yes
    </Location>

    <Location /sys>
        Require local
    </Location>
Load dependencies and restart Apache:
apt-get -y install git libapache2-mod-perl2 libapache-dbi-perl libauthen-simple-ldap-perl libdbd-mysql-perl
ln -s /opt/redmine/current/extra/svn/Redmine.pm /usr/share/perl5/Apache/
a2enmod perl cgi alias env cgi
service apache2 restart
https://git-scm.com/book/en/v2/Git-on-the-Server-Smart-HTTP
I can\’t use this tutorial with Debian stretch.
I have change ruby 2.4 with ruby 2.6.2
bundle install –without development test
The dependency tzinfo-data (>= 0) will be unused by any of the platforms Bundler is installing for. Bundler is installing for ruby but the dependency is only for x86-mingw32, x64-mingw32, x86-mswin32. To add those platforms to the bundle, run `bundle lock –add-platform x86-mingw32 x64-mingw32 x86-mswin32`.
# ….
bundler could not find compatible versions for gem \”bundler\”:
In Gemfile:
bundler (>= 1.5.0, = 0) will be unused by any of the platforms Bundler is installing for. Bundler is installing for ruby but the dependency is only for x86-mingw32, x64-mingw32, x86-mswin32. To add those platforms to the bundle, run `bundle lock –add-platform x86-mingw32 x64-mingw32 x86-mswin32`.
Fetching gem metadata from https://rubygems.org/………….
Fetching gem metadata from https://rubygems.org/.
Resolving dependencies…
Bundler could not find compatible versions for gem \”bundler\”:
In Gemfile:
bundler (>= 1.5.0, = 1.5.0, < 2.0.0)\' in any of the relevant sources:
the local ruby installation
You can see all her :
https://wiki.visionduweb.fr/index.php?title=Installer_Redmine_sur_Debian_avec_RVM#Installer_bundler_et_passenger
Thanks to the feedback!
Tho I note that Redmine 3.4 is not officially compatible with Ruby 2.6.x.
Source: http://www.redmine.org/projects/redmine/wiki/RedmineInstall
Cheers,
-Martin
Thanks for your quick answer.
I continued to investigate this problem, I was able to identify:
First :
How to install the correct version of the bundle:
# Delete all the gems.
rvm all do gem uninstall bundler
# Remove gems based on their version.
rvm 2.0.1 do gem uninstall bundler
# Install your own version of the gems.
gem install bundler -v ‘~> 1.9.0’
Then:
Then, the mysql2 gem did not install. I was able to identify the package to install: default-libmysqlclient-dev to replace libmysqlclient-dev
The equivalent package for mariadb is libmariadbclient-dev
sudo apt install default-libmysqlclient-dev
Now, the installation should be functional with Debian 9.5 and the latest version of Redmine on svn branch 3.4 (http://svn.redmine.org/redmine/branches/3.4-stable current).
To improve your tutorial, it would be nice to include how to update the database, this is essential for people who want to deploy Redmine, and not necessarily easy to understand.
Check if its lines can match for your tutorial, and, when to include them, or, adapt them if necessary:
$ bundle exec rake generate_secret_token RAILS_ENV = production
$ exec rake bundle db: migrate RAILS_ENV = production
$ bundle exec redmine rake: plugins: migrate RAILS_ENV = production
$ bundle exec rake tmp: cache: clear tmp: sessions: clear RAILS_ENV = production
Information from the first tutorial presented on my wiki: https://wiki.visionduweb.fr/index.php?title=Installer_Redmine_sur_Debian_avec_RVM#Installation_:_Installation_et_mise_.C3.A0_jour_de_Redmine